Google Apps Script for Android Translation
23 Aug 2021Normally we get strings.xml files from our translation team, but today was one of those days, where (due to time
constraints) we got the source Google Sheet file. We had to generate strings.xml files out of these. This gave me
the perfect opportunity to explore Google Apps Script which you could run
on your Google Sheet.
Google Sheet format for Translations
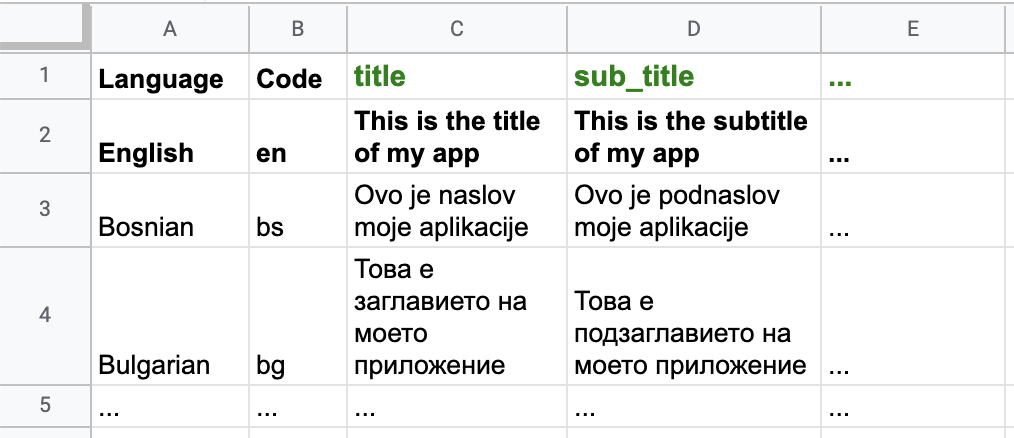
The above is the general format of the sheet. Each row represents a language, and each column represents a key. So in the above
case, for language en, the strings.xml file should be as follows:
<?xml version="1.0" encoding="UTF-8"?>
<resources>
    <string name="title">This is the title of my app</string>
    <string name="sub_title">This is the sub title of my app</string>
</resources>
Adding Google Apps Script
To add the script, in your Google Sheet, click on Tools -> Script editor. You can then add your JS code in the Editor. In our case, we will
add a menu “Android” to the menu bar, and then a sub-menu under it called “Export”. Clicking on this will generate a “Translations”
folder and sub folders like “values-en”, “values-bs”, etc… each containing the corresponding strings.xml file. We can
then download the folder “Translations” and use it in our Android project.
The Code
For the full working script take a look at this gist.
The onOpen() function adds the menu to the bar, along with the JS function to invoke when the menu is clicked.
function onOpen() {
  SpreadsheetApp.getUi()
      .createMenu('Android')
      .addItem('Export', 'exportTranslations')
      .addToUi();
}
The exportTranslations() function uses other functions to get the data from the Sheet, parses the data, constructs
the strings.xml file’s content, and then uploads the file (along with the values folder) to Google Drive.
function exportTranslations() {
  const ss = SpreadsheetApp.getActiveSpreadsheet();
  const sheet = ss.getActiveSheet();
  const rowsData = getDataRange(sheet);

  const folder = DriveApp.createFolder("Translations");
  const strings = [];
  for (let i = 0; i < rowsData.length; i++) {
    const row = rowsData[i];
    const stringFile = constructTranslation(row);
    strings.push(stringFile.content);
    const language = stringFile.language;
    const subFolder = folder.createFolder(`values-${language}`);
    subFolder.createFile("strings.xml", stringFile.content);
  }
  SpreadsheetApp.getUi().alert("Translations created and uploaded to Drive.");
}
The DriveApp is used to create folders and files in Google Drive.
The remaining functions are just to parse the Cells in the sheet and get the data in a proper format. You can take a look at the gist to know more.
const headersRange = sheet.getRange(1, 2, 1, sheet.getMaxColumns());
const dataRange = sheet.getRange(2, 2, sheet.getMaxRows(), sheet.getMaxColumns());
This is how the header and the actual data is read from the Sheet. dataRange is nothing but a two dimensional array whose
data starts at 2nd Row and 2nd Column, and extends till the row / column ends. If we encounter a row or column that’s empty,
we stop our processing there.
Conclusion
This is nothing huge. All we did was read a Google Sheet, and processed the data, and uploaded it to Google Drive. But we did it all from Google Sheets, and we can ship the script along with the Sheet itself. That’s neat. I hope this helps you the next time you have some data in a Google Sheet and you have to do something with it. Go crazy!